Amorphous M7/M6 Rebuild Project
-
drak130

- 100+ Posts
- Posts: 173
- Joined: Mon Oct 21, 2019 7:59 am
- Location: Angier, NC
- Contact:
Re: Amorphous M7/M6 Rebuild Project
Would have taken me a week and it would have been 180 degrees off
-
asa
- 100+ Posts
- Posts: 298
- Joined: Sat Dec 22, 2018 1:09 pm
- Location: KY+AK
- Contact:
Re: Amorphous M7/M6 Rebuild Project
Thanks for the kind words! Some enjoyable work happening the past couple days.
The culmination of the part from last post, for posterity.

Final dry fit of the left boot cowl. Transponder antenna is on there down low and OAT for the EDM900 is the silver thing. People will say there are better places to put OAT and I agree but this was an exceptionally easy place.

There were no issues with fitment or anything so I only un-cleco'd (de-cleco? decleco?) the edges that needed silicone, namely the firewall and front lower portion. This made it much easier than having to position the whole thing with silicone.

Complete left boot cowl! One cleco left at the top where the center strap (part from last post) will overlap.

The flat black paint on the inside came out great, it looks like the inside of the oratex fabric. I started this project using a green zinc based primer on parts. Later switched to the grey primer which I've fell in love with - shoot great, hardens quick, durable. That panel around the landing gear is the only visible remnant of green primer. It's leaving a legacy I guess. An astute observer might notice that my instrument panel grey is eerily similar to my primer grey...

Finishing up left side boot cowl subassembly today by riveting in the cowl fastener receptacles, nut plates, and boot cowl window. All came out looking good! Excited to mount this tomorrow once the silicone is dry.


Also got the skylight sealed in for good, but no pictures. That was heinous trying to get all the fasteners in, and smooth/clean the silicone before the 12min skin time of the sealant. There's like 40 #6 screws and it spans both sides of the airplane on the top, inside and out, so it was a definite sprint even with tools and fasteners all laid out ready to go. But it's done!
Meanwhile, my partner is bikepacking through patagonia solo. She also works a summer seasonal job in Alaska. Her views are better, but honestly I really enjoy working on this plane... most days.

The culmination of the part from last post, for posterity.
Final dry fit of the left boot cowl. Transponder antenna is on there down low and OAT for the EDM900 is the silver thing. People will say there are better places to put OAT and I agree but this was an exceptionally easy place.
There were no issues with fitment or anything so I only un-cleco'd (de-cleco? decleco?) the edges that needed silicone, namely the firewall and front lower portion. This made it much easier than having to position the whole thing with silicone.
Complete left boot cowl! One cleco left at the top where the center strap (part from last post) will overlap.
The flat black paint on the inside came out great, it looks like the inside of the oratex fabric. I started this project using a green zinc based primer on parts. Later switched to the grey primer which I've fell in love with - shoot great, hardens quick, durable. That panel around the landing gear is the only visible remnant of green primer. It's leaving a legacy I guess. An astute observer might notice that my instrument panel grey is eerily similar to my primer grey...
Finishing up left side boot cowl subassembly today by riveting in the cowl fastener receptacles, nut plates, and boot cowl window. All came out looking good! Excited to mount this tomorrow once the silicone is dry.
Also got the skylight sealed in for good, but no pictures. That was heinous trying to get all the fasteners in, and smooth/clean the silicone before the 12min skin time of the sealant. There's like 40 #6 screws and it spans both sides of the airplane on the top, inside and out, so it was a definite sprint even with tools and fasteners all laid out ready to go. But it's done!
Meanwhile, my partner is bikepacking through patagonia solo. She also works a summer seasonal job in Alaska. Her views are better, but honestly I really enjoy working on this plane... most days.
-
Kirk
- 100+ Posts
- Posts: 737
- Joined: Tue Oct 17, 2006 3:07 pm
- Location: KGCY
- Contact:
Re: Amorphous M7/M6 Rebuild Project
I like the contrast of the gray instrument panel and the black sub panel. Planning a panel update for mine after engine/prop swap is done. I had been planning black since most new avionics are black surface mount.
Have always like gray panels but didn’t think it would look good but I like how yours looks and never considered having the sub panel black… So much to think about.
Kirk
Have always like gray panels but didn’t think it would look good but I like how yours looks and never considered having the sub panel black… So much to think about.
Kirk
-
asa
- 100+ Posts
- Posts: 298
- Joined: Sat Dec 22, 2018 1:09 pm
- Location: KY+AK
- Contact:
Re: Amorphous M7/M6 Rebuild Project
Kirk, I think the grey actually makes the black instruments look better and it goes with nearly any interior color. Mine wasn't the exact shade I wanted, I'd have liked a bit darker but I had the paint. With the modular panel system, I think I could have the grey upper panels out in 15 minutes to repaint. The lower panel is basically at the root of everything. You'd have to remove everything in/on the panel including engine controls to get it out, so I powdercoated it to make the coating last longer. It's not my idea, the two tone panels have been in style in cessnas for a while. I think they look modern/simple/clean. Would definitely recommend switching to the modular panel system when you do your upgrade.Kirk wrote: ↑Mon Jan 09, 2023 2:48 amI like the contrast of the gray instrument panel and the black sub panel. Planning a panel update for mine after engine/prop swap is done. I had been planning black since most new avionics are black surface mount.
Have always like gray panels but didn’t think it would look good but I like how yours looks and never considered having the sub panel black… So much to think about.
Kirk
------------------------
Another day, another boot cowl installed. Went well overall. Afterwards, cleaned out the belly and went ahead and put the floorboards and interior panels in. I am overall very aesthetically pleased by the footwell area and so far, the cabin in general. I wanted the inside of the boot cowls to just blend into the shadows behind the other components and I think I achieved it. I noticed that the only things that have color are the very important things - fire extinguisher, throttle/prop/mixture controls, flap handle, fuel selector. Seems appropriate.


Gotta get the glamour shot with my work light...

And onto the glareshield

-
asa
- 100+ Posts
- Posts: 298
- Joined: Sat Dec 22, 2018 1:09 pm
- Location: KY+AK
- Contact:
Re: Amorphous M7/M6 Rebuild Project
Today's task was the glareshield. The one that came with it was pretty worn out and hacked up. Decided to just go for it and make it like I wanted instead of just throw it on. I decided to add a larger avionics access panel on top that would also cut out some of the damaged fiberglass. Also wanted to extend it to give me a small overhang on the instruments. Not so much for blocking the sun, but for a clean look. It's only about 3/8" but I think it looks good and hides the panel edges.
Tape the instruments/wiring off since I'll be doing some work above it. Don't want to clean out shavings or have metal shavings in my electrical system.

After initial work, this was the mockup. I went with an FR4 fiberglass sheet for the access panel just in case I wanted to put something with an antenna behind the panel under the glareshield. The green lip is just some pre-primed aluminum strips I had on hand.

Trim, sand, prime, some body filler, sand again, install nut plates,, rivet aluminum lip to the fiberglass, install for test fit.

Aaaaand.... covered and installed. I don't rivet after 10pm due to lessons learned so I'll do that in the morning. The covering material is the glareshield vinyl from SCS interiors. $50 for 1 unit which is 18"x54" and comes with a burn cert. Looks great. Might replace screws with black. Not sure about the windshield fitment/interface so I cut the fabric conservatively just in case. Second pic you can see the small overhang.


Tape the instruments/wiring off since I'll be doing some work above it. Don't want to clean out shavings or have metal shavings in my electrical system.
After initial work, this was the mockup. I went with an FR4 fiberglass sheet for the access panel just in case I wanted to put something with an antenna behind the panel under the glareshield. The green lip is just some pre-primed aluminum strips I had on hand.
Trim, sand, prime, some body filler, sand again, install nut plates,, rivet aluminum lip to the fiberglass, install for test fit.
Aaaaand.... covered and installed. I don't rivet after 10pm due to lessons learned so I'll do that in the morning. The covering material is the glareshield vinyl from SCS interiors. $50 for 1 unit which is 18"x54" and comes with a burn cert. Looks great. Might replace screws with black. Not sure about the windshield fitment/interface so I cut the fabric conservatively just in case. Second pic you can see the small overhang.
-
drak130
- 100+ Posts
- Posts: 173
- Joined: Mon Oct 21, 2019 7:59 am
- Location: Angier, NC
- Contact:
Re: Amorphous M7/M6 Rebuild Project
That set up is gorgeous and practical. You do some nice work sir!
-
asa
- 100+ Posts
- Posts: 298
- Joined: Sat Dec 22, 2018 1:09 pm
- Location: KY+AK
- Contact:
Re: Amorphous M7/M6 Rebuild Project
Thank you! I try. I often do things twice before I'm happy with it. Wasn't an option here as I had exactly the right amount of material haha.

A little more work on glareshield. Riveted everything and switched to black screws. Also checked fit of the windshield surround pieces. Since this is a new fuselage, you never really know if things are going to fit until you try, or you can build in place. All these fairings fit pretty well. Windshield was supposed to ship by end of this week but I did not hear if it did or not.

When I made the access panel, I installed 4 nut plates in the mounting pattern for my GDL50 mount in case I decided to put it up there, or anything else I wanted to mount. Ended up putting it hidden under the glareshield though so maybe I'll use these for a compass or a bobblehead. Drilled a wire pass through just forward of the mount holes as well, you can barely see the X slit.

Thanks to the GDL 50, dual AHRS and synthetic vision. Hope to never need either of these but nice to have. GDL also gives ADS-B and is another GPS source for the 660. It's hard wired to power so it boots when the avionics bus is powered on and shuts down on the condition that power is removed AND the 660 shuts off.

Initial test fit of some secondhand gear fairings. Not sure if I'll refurbish these or make new. Clamps positioned for perfectly poking eyes.

-
asa
- 100+ Posts
- Posts: 298
- Joined: Sat Dec 22, 2018 1:09 pm
- Location: KY+AK
- Contact:
Re: Amorphous M7/M6 Rebuild Project
Was getting a jump on the paperwork side of the project this morning. All of this work boils down to 4 new STC's (AV30, extended gear, EDM900, Oratex). Then lots of new parts. Almost to a full deck of Maule green tags. My plan is to do five 337's. I say plan but I've already got them typed up. One for each STC plus one covering the overall rebuild with all the new parts. How would others do it? I think I could easily add the Oratex STC to the rebuild but it just adds more crap to a long 337.

Finally test fit the cowl. I'm not a religious person, quite the opposite, but maybe this will change that - it fit on the first try, every fastener. Will remove for sand/paint. No repairs needed on it that I've found so far. This picture makes the paint look amazing but it's not that good in real life. I don't feel bad sanding it down. Had been procrastinating this step for a few days but now it's over and went better than expected.

Finally test fit the cowl. I'm not a religious person, quite the opposite, but maybe this will change that - it fit on the first try, every fastener. Will remove for sand/paint. No repairs needed on it that I've found so far. This picture makes the paint look amazing but it's not that good in real life. I don't feel bad sanding it down. Had been procrastinating this step for a few days but now it's over and went better than expected.
-
wtxdragger
- 100+ Posts
- Posts: 244
- Joined: Sat Nov 09, 2013 3:46 pm
- Location: Iraan,Texas
- Contact:
Re: Amorphous M7/M6 Rebuild Project
Asa,
Thoroughly impressed and appreciate all the information on the process. Not that I'll ever use it to complete a rebuild project, but it is invaluable as I learn all the in and outs of my Maule.
Thanks again
Thoroughly impressed and appreciate all the information on the process. Not that I'll ever use it to complete a rebuild project, but it is invaluable as I learn all the in and outs of my Maule.
Thanks again
Mercifully Free from the Ravages of Intelligence
1989 M7-235 N90KD
1975 T210L N1675X
2022 CCK-1865 N922UM
https://www.instagram.com/wtxdragger/
1989 M7-235 N90KD
1975 T210L N1675X
2022 CCK-1865 N922UM
https://www.instagram.com/wtxdragger/
-
TimB
- 100+ Posts
- Posts: 187
- Joined: Sun Nov 15, 2009 5:19 pm
- Contact:
-
asa
- 100+ Posts
- Posts: 298
- Joined: Sat Dec 22, 2018 1:09 pm
- Location: KY+AK
- Contact:
Re: Amorphous M7/M6 Rebuild Project
Thanks and you're welcome! I was lucky enough to witness my mechanic rebuild his M6 a couple years ago and that was pretty critical to this project's success. Hopefully some good will come of someone seeing my rebuild as well.wtxdragger wrote: ↑Sun Jan 15, 2023 5:39 pmAsa,
Thoroughly impressed and appreciate all the information on the process. Not that I'll ever use it to complete a rebuild project, but it is invaluable as I learn all the in and outs of my Maule.
Thanks again
That looks great. The holes don't line up right on the used ones I received so I'll just use them as a pattern. Will likely delay this until later since it can pass annual without those.
Received my windshield after ordering it in late October. Ordered through Cee Baileys for $600 which was the cheapest company. They outsourced it to LP Aero, which sells their same windshield for $940 (Maule, Solar Grey, 0.150" thickness). So I saved $340 by adding a middle man? Economics!
It's not as dark in real life as it looks in these pics, I think because the protective spray coating. I'm not sure you'd know it wasn't clear, it's lighter tint than the green that came off the plane.

After initial fitment, it definitely needed a trim. At least 1" off bottom, a wedge off the sides, nothing on top. I used a dremel with a reinforced cutoff wheel. Worked great, good control, no jumping or anything. It left a nice edge but I used an 80grit flap wheel on my drill to smooth it out. Did this fit-trim process 4 times because I was worried about taking too much off.

After a few rounds of trimming. Close enough to fit the fairings on but I'd like to do some small trims in places where it's tight. Will still have to drill the holes on top, sand the edges better, mask it off, etc etc to install but hopefully the trimming will be done in the morning.

Turns out that there is a world OUTSIDE the garage too...

-
asa
- 100+ Posts
- Posts: 298
- Joined: Sat Dec 22, 2018 1:09 pm
- Location: KY+AK
- Contact:
Re: Amorphous M7/M6 Rebuild Project
Windshield is trimmed/drilled/sanded and all masked for silicone but not yet sealed in. I trimmed it one more time after the last post and am really glad I did. Drilling the holes in the side and top was a little nervy. Got acrylic bits and tried to do it right but still not fun on an expensive windshield. Waiting to seal it up until I finish fitting the front doors... just in case.

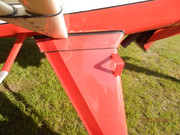
Installed Elevator Gap seals.

(invisible)

Installed Elevator Gap seals.
(invisible)
-
gbarrier
- 100+ Posts
- Posts: 1562
- Joined: Thu Jul 14, 2011 5:41 pm
- Location: 9NR4 North Carolina
- Contact:
Re: Amorphous M7/M6 Rebuild Project
So, lap joints like Maule does with Ceconite is not allowed?
Nice work by the way.
Nice work by the way.
-
asa
- 100+ Posts
- Posts: 298
- Joined: Sat Dec 22, 2018 1:09 pm
- Location: KY+AK
- Contact:
Re: Amorphous M7/M6 Rebuild Project
As far as I know, you can do it either way. I had an "oratex expert" leading the way on the cover and he was more comfortable with the stitching. This is the first airplane I've covered so I followed his guidance.
-
asa
- 100+ Posts
- Posts: 298
- Joined: Sat Dec 22, 2018 1:09 pm
- Location: KY+AK
- Contact:
Re: Amorphous M7/M6 Rebuild Project
Doors doors doors. One done, 2 fitted but need finished, 1 (pilot) untouched. This is the only time I wish the Maule had less doors. I've figured out the process though, just gotta chug through the fitment. For anyone else's knowledge, I estimate that having to fit/rebuild the doors will be about a week's worth of work as compared to if I could've just bolted on complete and painted doors. Rebuilding them without fitting them to a new fuselage would be significantly quicker as well.
Pictures from various points of building the copilot door. .


Pictures from various points of building the copilot door. .
Who is online
Users browsing this forum: No registered users and 19 guests