Instrument Panel Re-Do
Posted: Fri Dec 04, 2020 12:36 pm
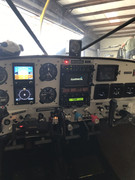
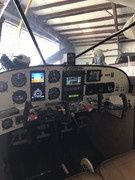
I'm looking at completely updating the panel on my M5.
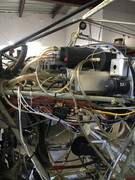
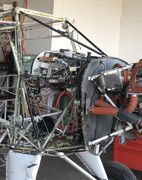
My thought is that the best way to gain access to the work area behind the panel is to remove the windscreen, the glare shield, and perhaps the fuselage side panels. The glare shield needs an overhaul anyway. Seems like a good time to install the modular instrument panel while we're at it.
Another option, however, is to use a die grinder to cut the existing panel leaving enough edge to install plate nuts. Then create a new panel face that would screw onto the remaining frame via the plate nuts and mount the avionics/instruments in the new panel. This would give me a removable panel without having to go through removing the windscreen and glare shield. Has anyone else done anything like this?
I'd actually rather go with the first option but I'm not sure how much work I'm getting into trying to remove the existing panel, glare shield, side panels, etc. It seems like it would be worth spending a couple of days taking it apart and another couple putting it back together if that's all it is.
Looking for feedback on how any of you have done panel upgrades short of just spending a lot of time on your back looking up into a black abyss.